Start Windows 10 in safe mode
When troubleshooting a PC, a common task is to start Windows in Safe Mode.
Some of the reasons you may find you need to boot into safe mode are:
- You might encounter a problem during the normal start-up of the operating system.
- A problem might occur during the normal running of the computer.
- You may need to delete one or more files or folders that cannot be removed or accessed during normal operation.
- You may have malware that runs during the normal start-up of your computer and it cannot be cleaned.
If you are having an issue with the computer starting or running normally and the problem doesn’t occur when you restart your PC in safe mode, it’s unlikely that the default settings, basic device drivers or services in Windows are the cause of the problem. Try starting all of the apps on your desktop that you commonly use one by one (including the apps in your Startup folder) to see if a specific app might be causing the problem. If one of the apps is causing the problem, uninstall it or contact the software publisher.
If the problem appears while in safe mode, or you still can’t find the problem, you can try refreshing or resetting your PC.
There are various ways of getting into safe mode and depending on the current state of your computer:
To start Windows in safe mode once
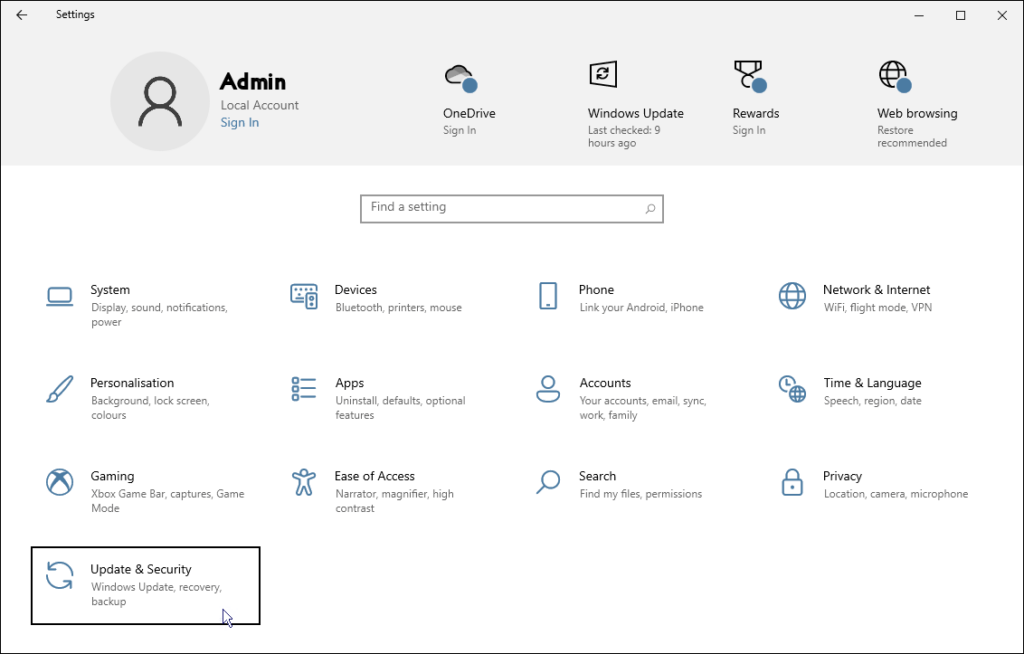
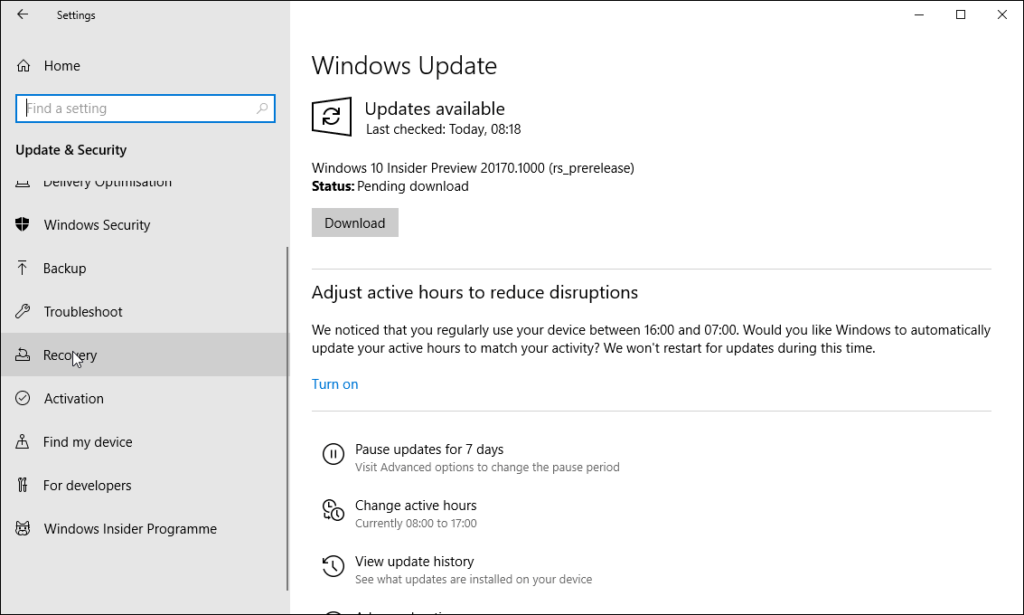
If the PC is running normally and you just want to restart Windows in safe mode one time, follow these steps:
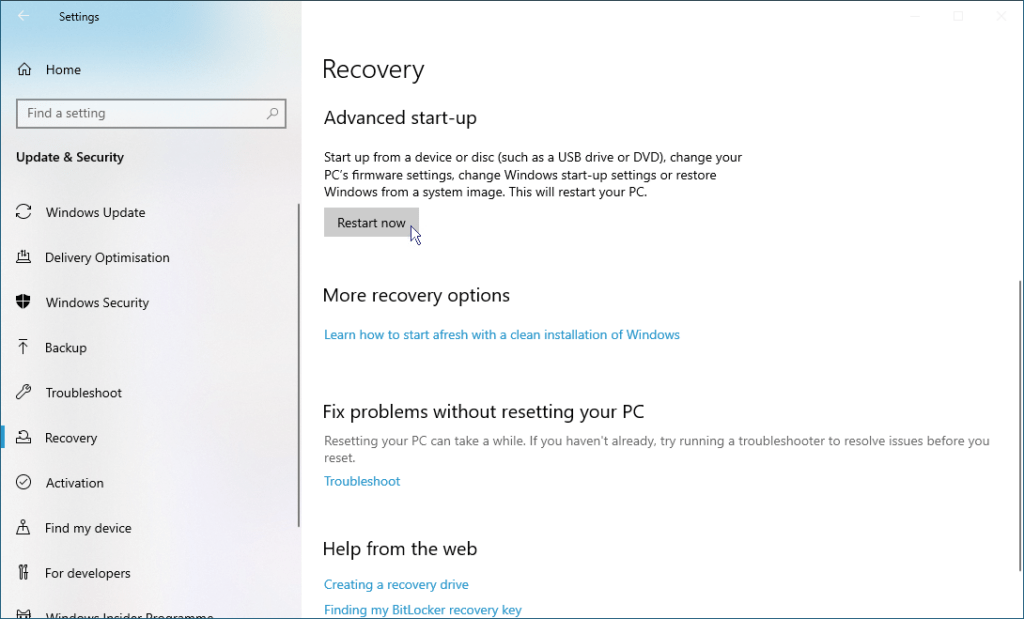
- On the Recovery page, click the Restart now button.
You want to start Windows in safe mode every time the computer starts.
- On your keyboard, press and hold
 (the Windows key) and whilst holding it, press R
 - In the Run dialogue that opens, type msconfig then click OK.

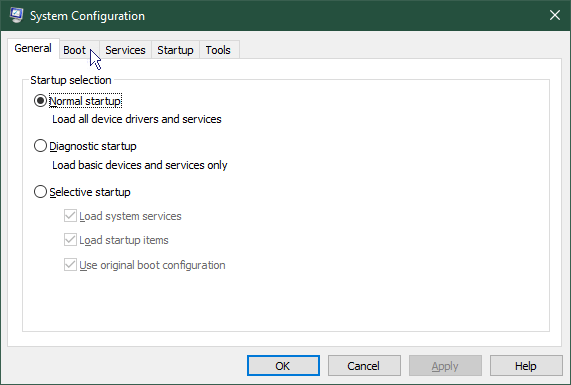
- On the System Configuration dialogue, click the Boot tab.
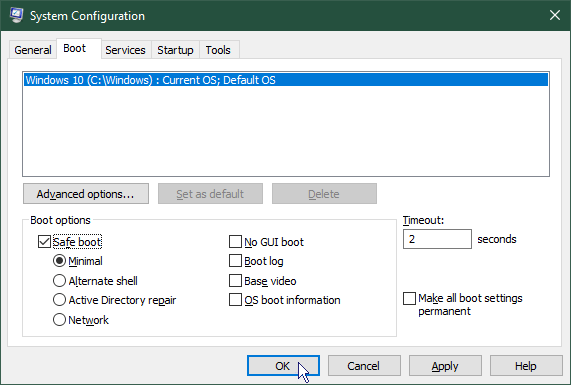
- On the Boot tab of the System Configuration dialogue, click the Safe boot tab check box then click OK.
- If you are ready to restart the computer, click the Restart button.
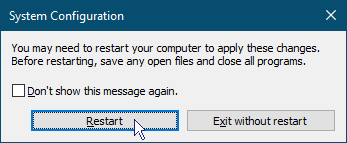
Each time Windows restarts, it will go into Safe mode. When you are ready to return to normal mode, reverse the process.
- On your keyboard, press and hold
 (the Windows key) and whilst holding it, press R
 - In the Run dialogue that opens, type msconfig then click OK.

- On the System Configuration dialogue, click the Normal startup radio button then click OK.
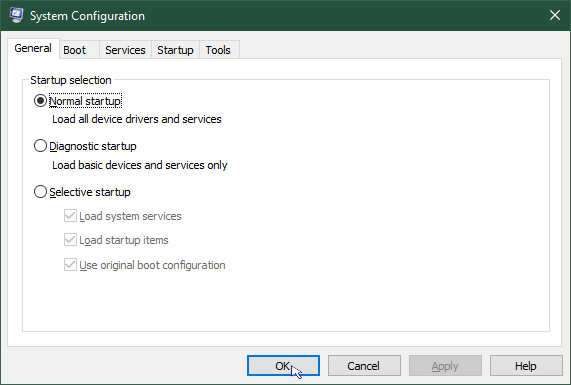
- To restart in normal mode click Restart.

You want the option of starting in safe mode every time the computer starts.
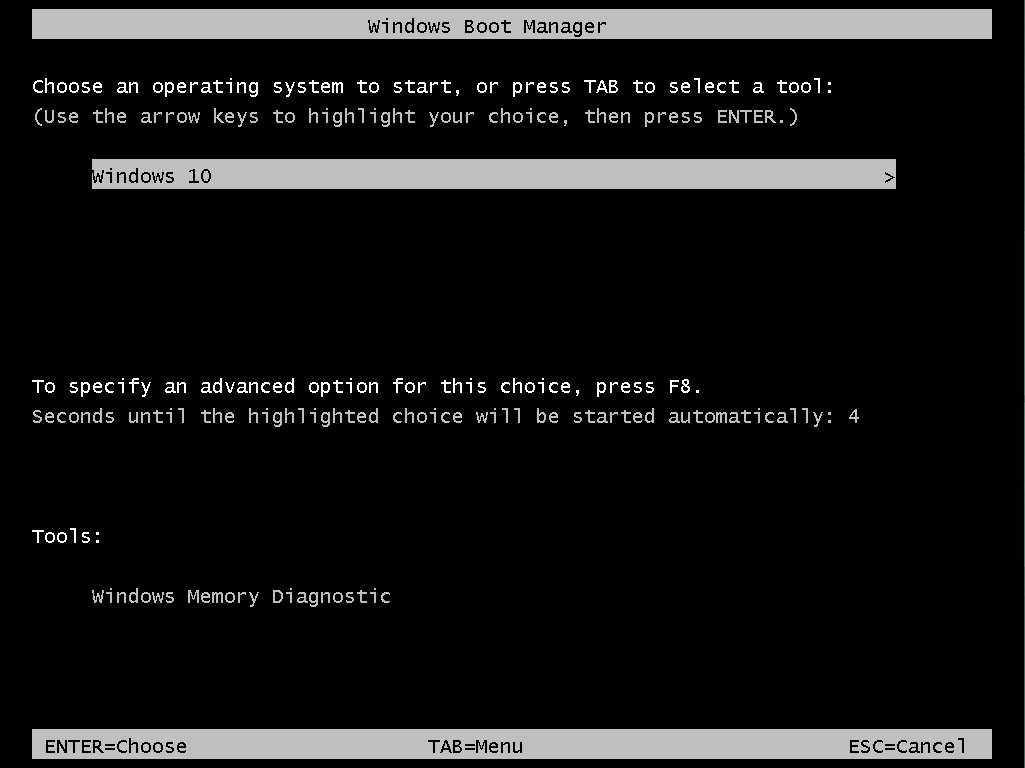
If your PC is starting and running normally but you want to have the option of starting it in safe mode whenever it starts up without having to go on the internet to look up how to do it, it can be easily set to do this by reintroducing the Windows Boot Manager menu.
Some people find this menu annoying, maybe they absolutely need their PC to start-up in nanoseconds, if you fall into this category then maybe this option is not for you but for the rest of us that live in the real world, it is a case of a stitch in time, saves nine.
To set this option, proceed as follows:
- On your keyboard, press and hold
 (the Windows key) and whilst holding it, press R
 - In the Run dialogue that opens, type cmd then click OK.

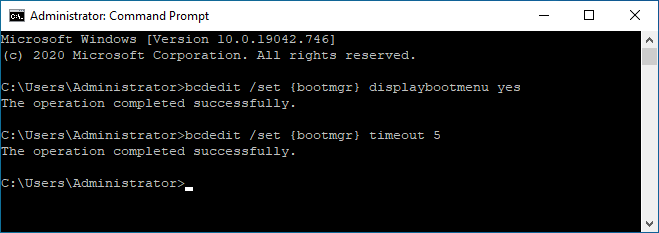
- In the command prompt window that opens, type the following 2 commands, each commnd followed by the Enter key:
bcdedit /set {bootmgr} displaybootmenu yes
bcdedit /set {bootmgr} timeout 5
Note: the number 5 is the number of seconds the start-up will be delayed before continuing normally, you can use a lower or higher number if you prefer
During the countdown, pressing Enter will immediately cause the computer to start normally. Also if you do nothing, the computer will start normally. Pressing any other key will halt the countdown and suspend the start-up awaiting input from you. At this point:
- Press the Enter key to continue with a normal start-up.
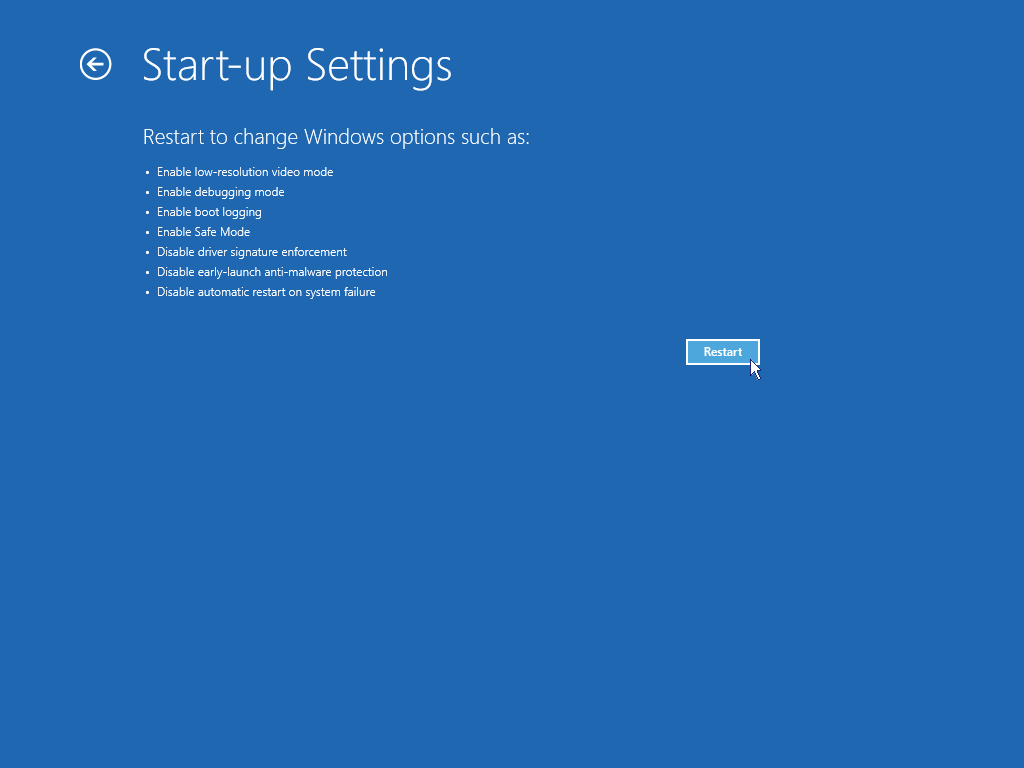
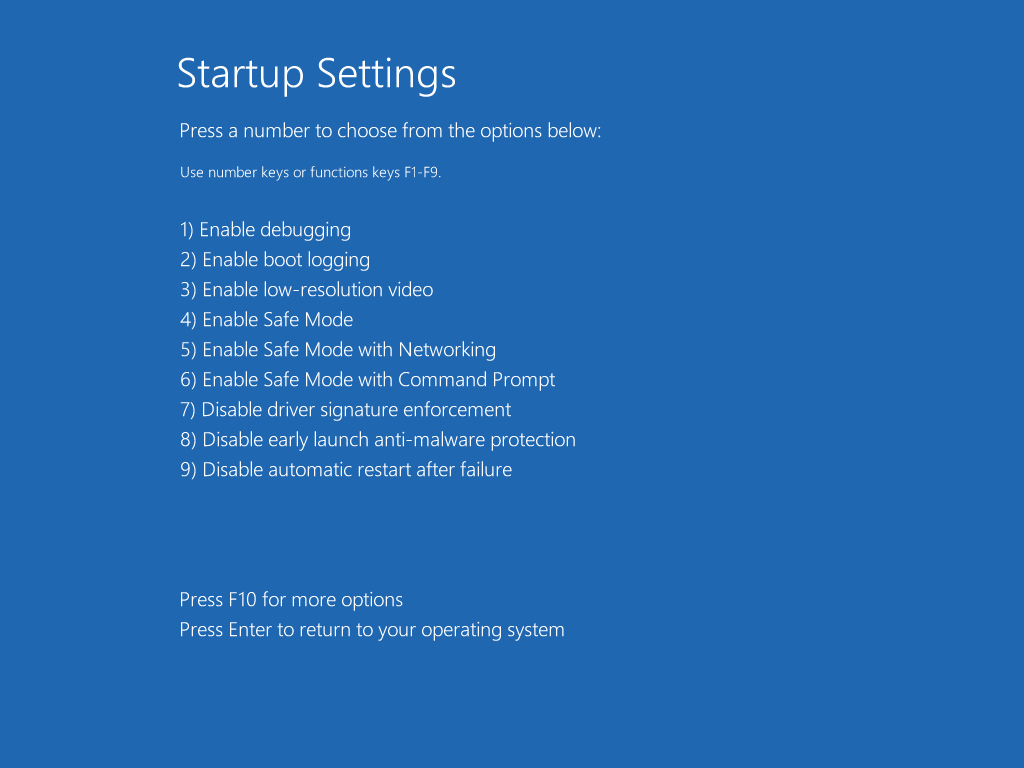
- Press F8 will present you with a Startup Settings screen and give you a list of options including Safe mode (4)
The PC will not start and get to the Windows logon screen.
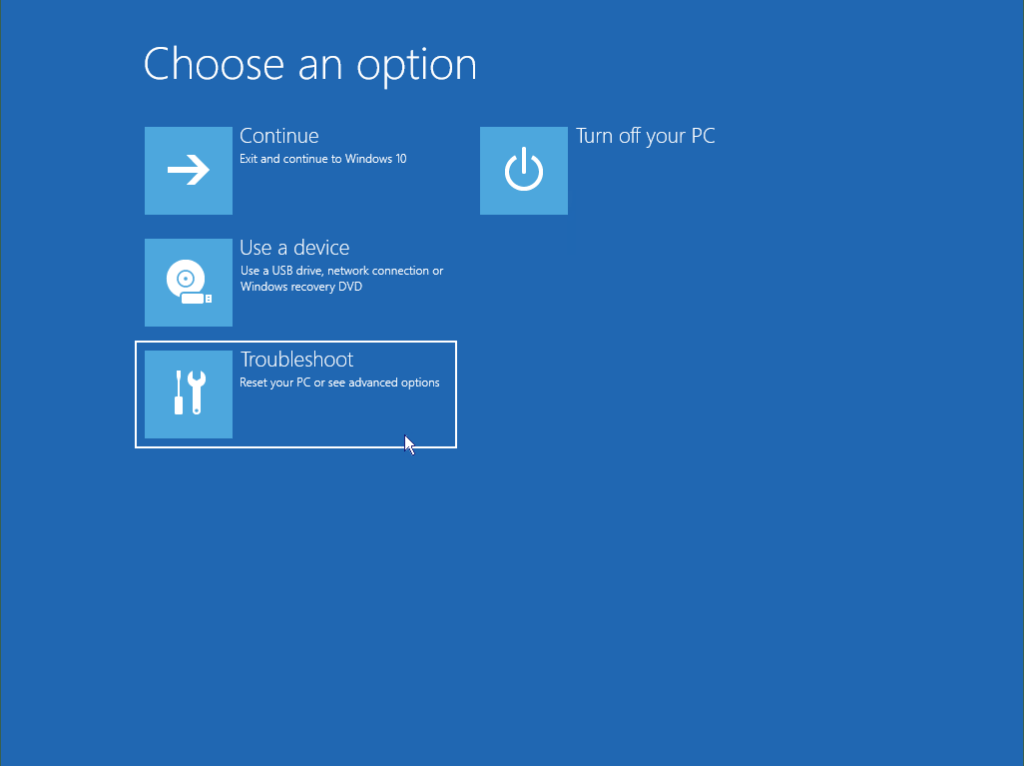
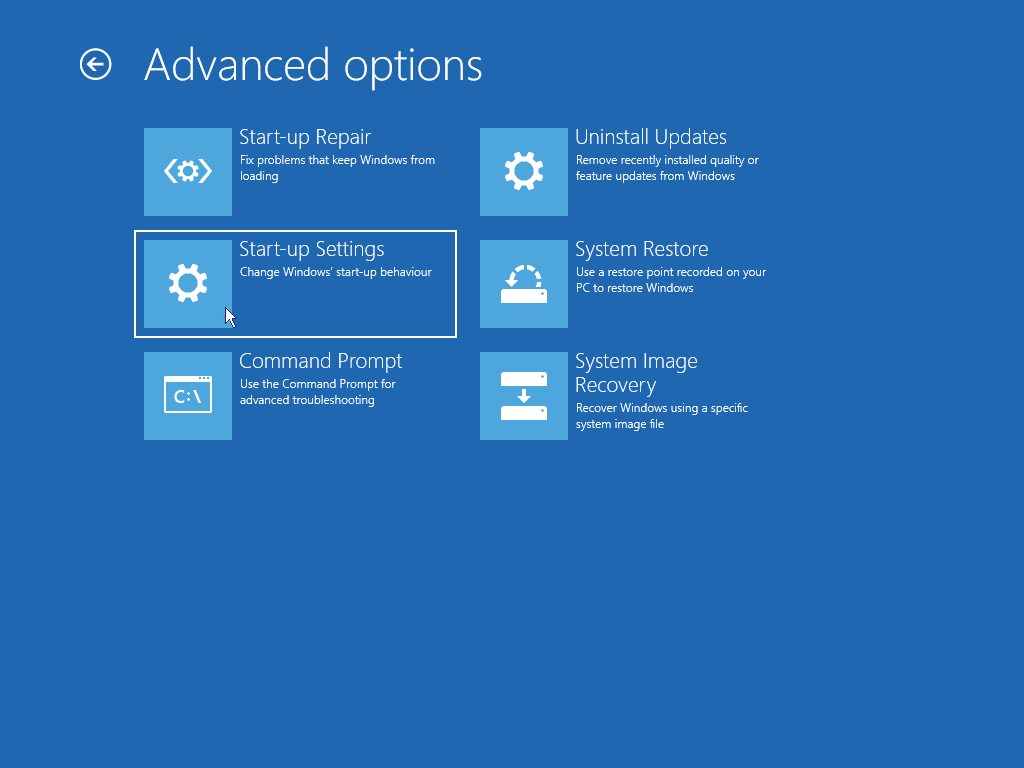
If your PC won’t start Windows normally two or more times in a row, it should automatically present you with a recovery screen option as below. This screen allows you to go to the advanced repair options and get into safe mode.
If you do not see this screen, you possibly have a fault such as a hard disk failure or other hardware error which is beyond the scope of this article and you should consider getting professional help, Contact us for support.
There are several options available to you on this menu, they are:
- Enable debugging
- Starts Windows in an advanced troubleshooting mode intended for IT pros and system admins.
- Enable boot logging
- Creates a file, ntbtlog.txt, that lists all the drivers that are installed during startup and that might be useful for advanced troubleshooting.
- Enable low-resolution video
- Starts Windows using your current video driver and using low resolution and refresh rate settings. You can use this mode to reset your display settings.
- Enable Safe Mode
- Starts Windows with a minimal set of drivers and services.
- Enable Safe Mode with Networking
- Starts Windows in safe mode and includes the network drivers and services needed to access the Internet or other computers on your network.
- Enable Safe Mode with Command Prompt
- Starts Windows in safe mode with a Command Prompt window instead of the usual Windows interface. This option is intended for IT pros and system admins.
- Disable driver signature enforcement
- Allows drivers containing improper signatures to be installed.
- Disable early launch antimalware protection
- Prevents the early launch antimalware driver from starting, allowing drivers that might contain malware to be installed.
- Disable automatic restart after failure
- Prevents Windows from automatically restarting if an error causes Windows to fail. Choose this option only if Windows is stuck in a loop where Windows fails, tries to restart, and fails again repeatedly.
For instance, to start in Safe mode, press 4.
Note: If you do not choose an item from this menu within a relatively short time, the computer will shut down.

 (the start button).